Easy Right Facing Riding a Horse Drawing
Horses are beautiful and majestic creatures that have been by our side for thousands of years. As beloved as these creatures are, if you mention drawing one to an artist they will probably get very nervous!
Despite this reputation, if you're wanting to learn how to draw a horse, you're in the right place!
As with any drawing challenge, the best way to make it easier is to break it down into more manageable steps.
For this reason, we created this fun and simple step-by-step guide on how to draw a horse in 9 easy steps to make drawing this difficult animal a breeze for you!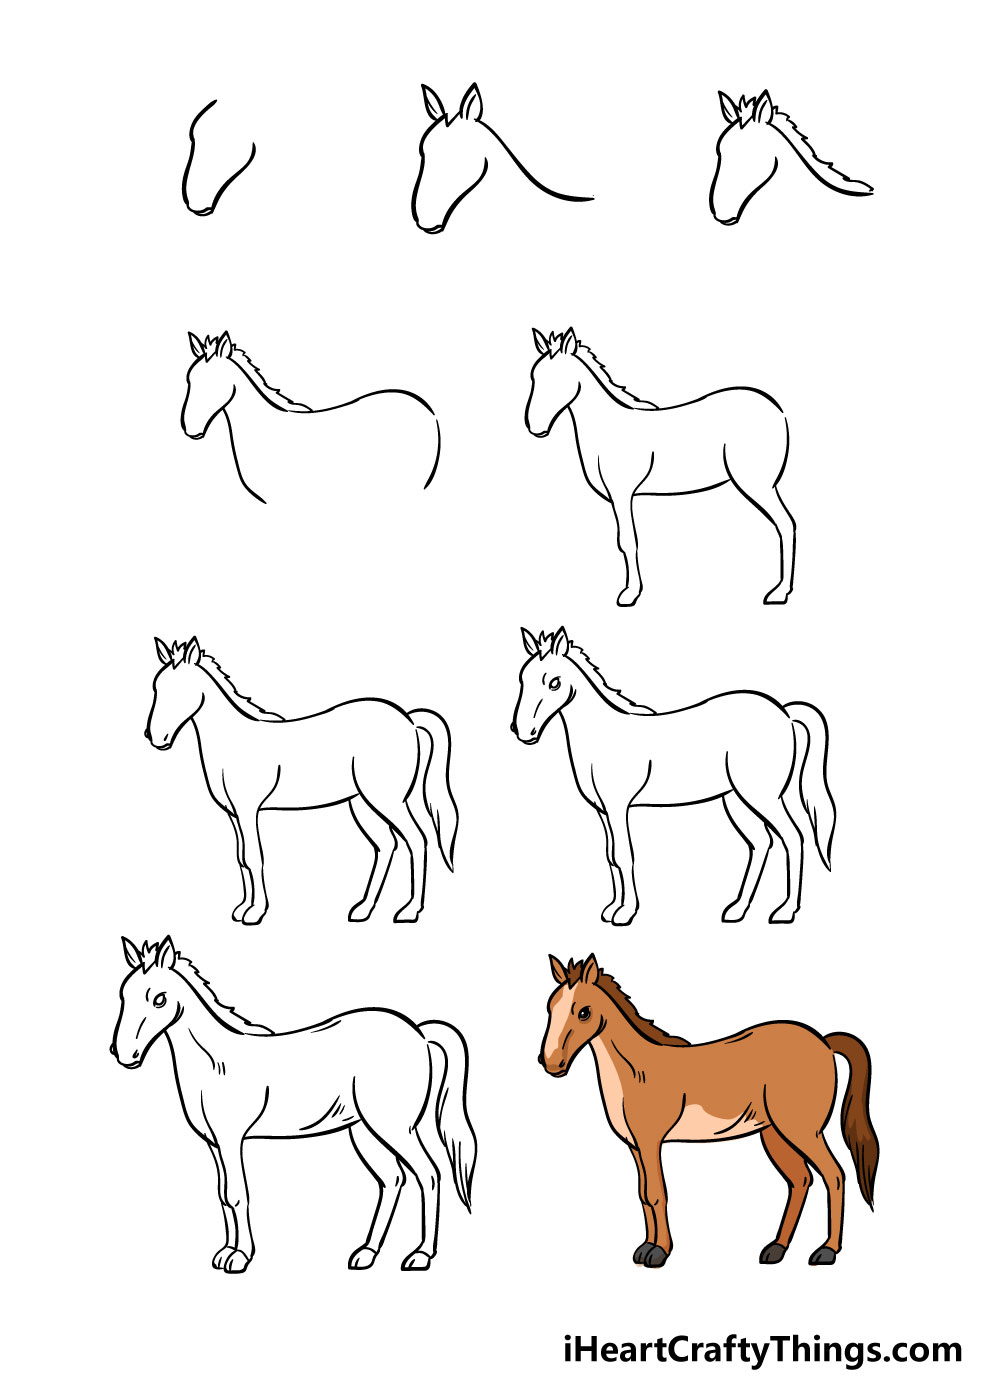
What's in this Blog Post
- How to Draw a Horse – Let's get Started!
- Step 1
- Step 2 – Draw in the mane
- Step 3 – Next, draw in the neck and back
- Step 4 – Now draw in the first legs and stomach
- Step 5 – Next you will be adding the next legs, tail and details
- Step 6 – Add in the eyes and face details
- Step 7 – Now draw in the final details
- Step 8 – Finish it off with some color
- Step 9 – Now simply add the colors
- Here's how you can make your horse drawing even better…
- Your Horse Drawing is Complete!
How to Draw a Horse – Let's get Started!
Step 1
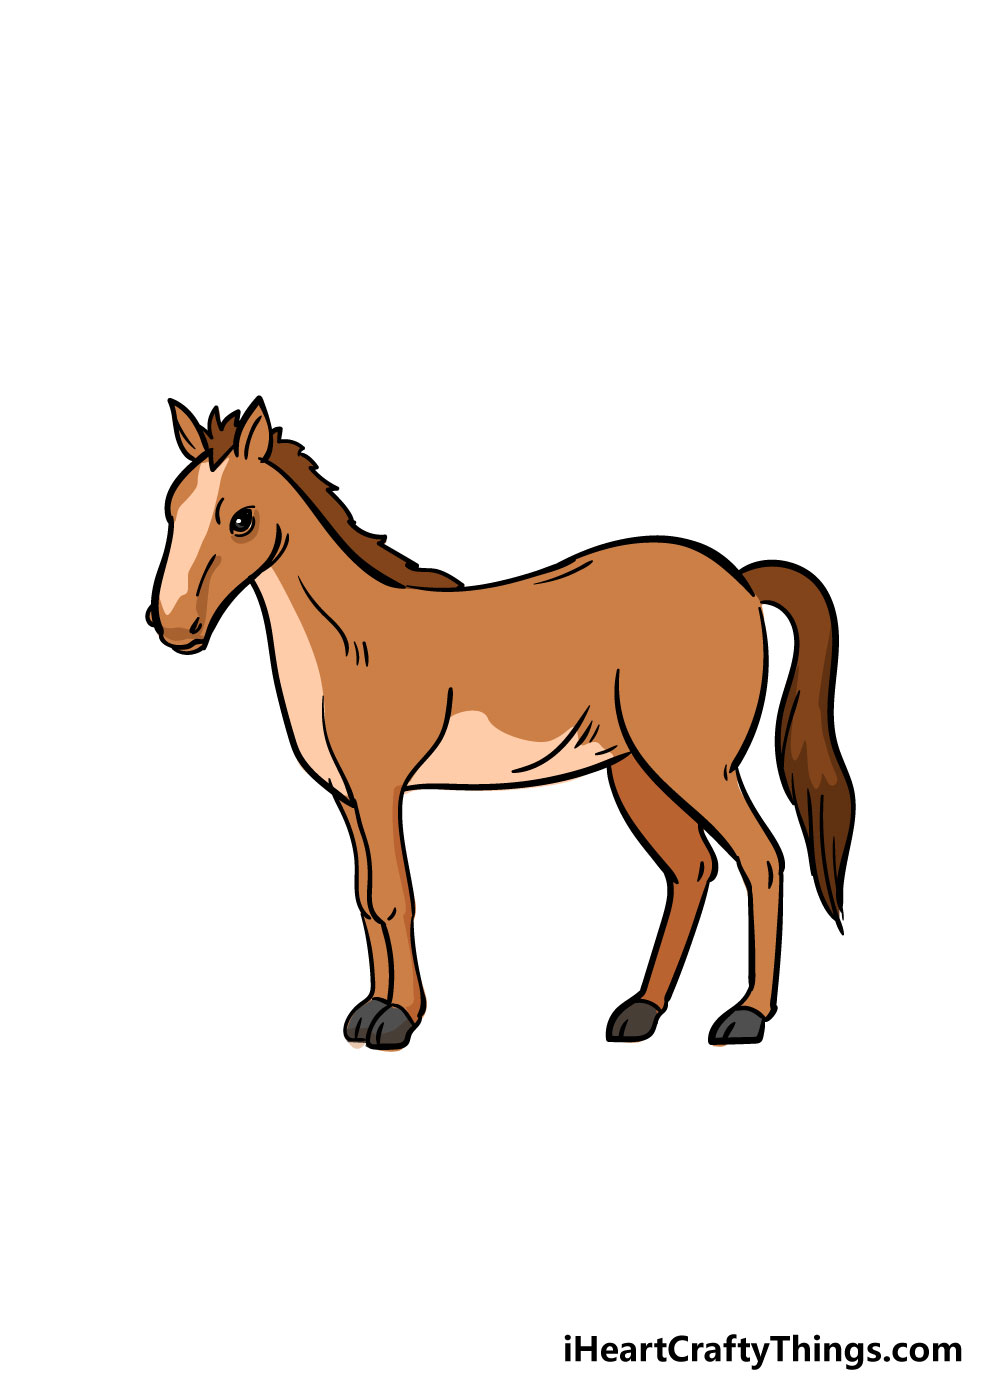
For the first step in your journey of learning how to draw a horse, we will be starting off with the head.
Referring to the reference image will be very helpful throughout this process, and these pictures are here to help you! On your first attempt, I would recommend using a pencil to start with.
Using some curvy lines, you can start with the snout and face of the horse as you can see in the picture.
Take it nice and slow as you try to replicate the shape in the image. Once you have this, draw in the two small, triangular ears and then a curved line for the back of the neck.
Step 2 – Draw in the mane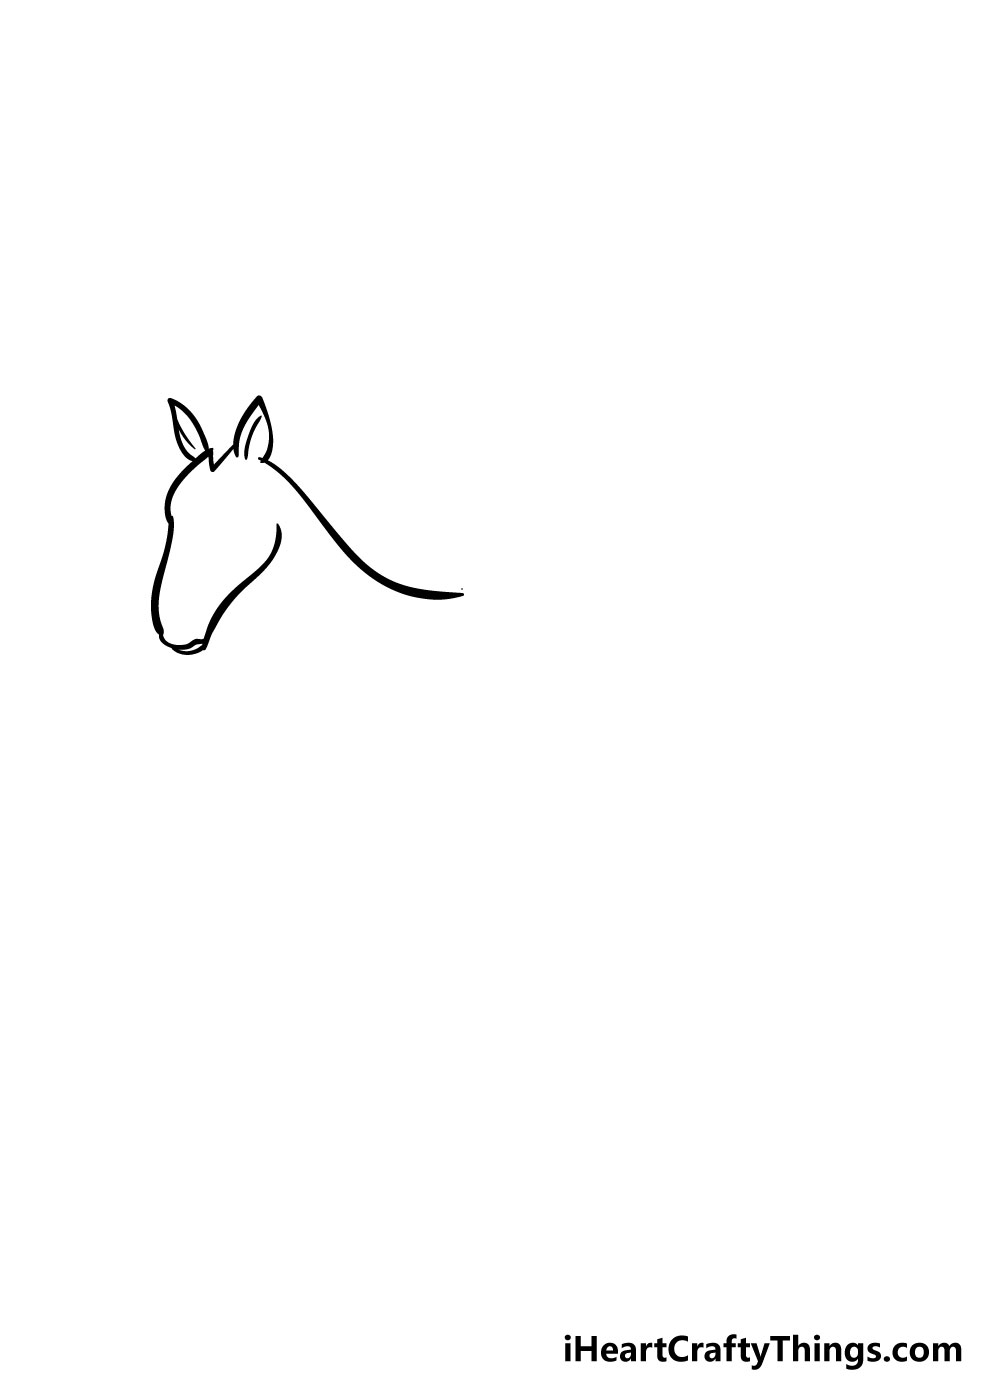
For the second step of your horse drawing, we will be adding in the horse's mane. Start off by adding some jagged lines between the ears.
Once you have that in, draw in a similarly jagged line extending from the right-hand ear and down the length of the neck.
This part may take a bit of practice, but I know that you'll get the hang of it soon!
Step 3 – Next, draw in the neck and back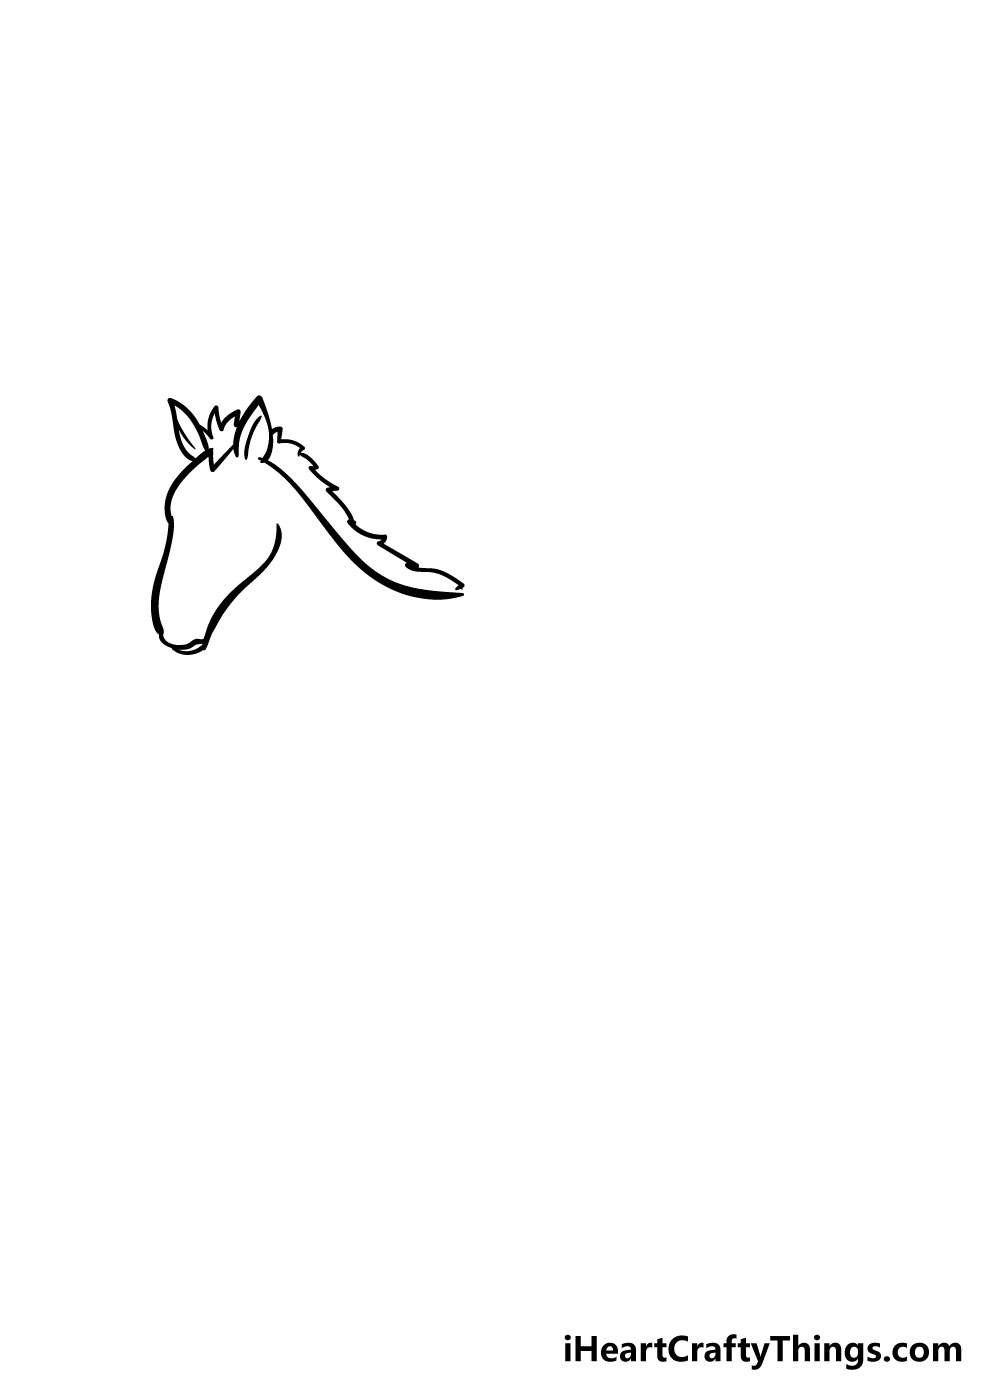
Once you have the mane drawn in for your horse drawing, we will be adding in the neck and back.
For the neck, simply draw in a slightly curved line down from the jaw of the horse as you can see in the reference picture.
Next, draw in a few curved lines extending from the mane and curving at the backend to form the horse's back. This is another tricky step, so referring to the picture closely will really help!
Step 4 – Now draw in the first legs and stomach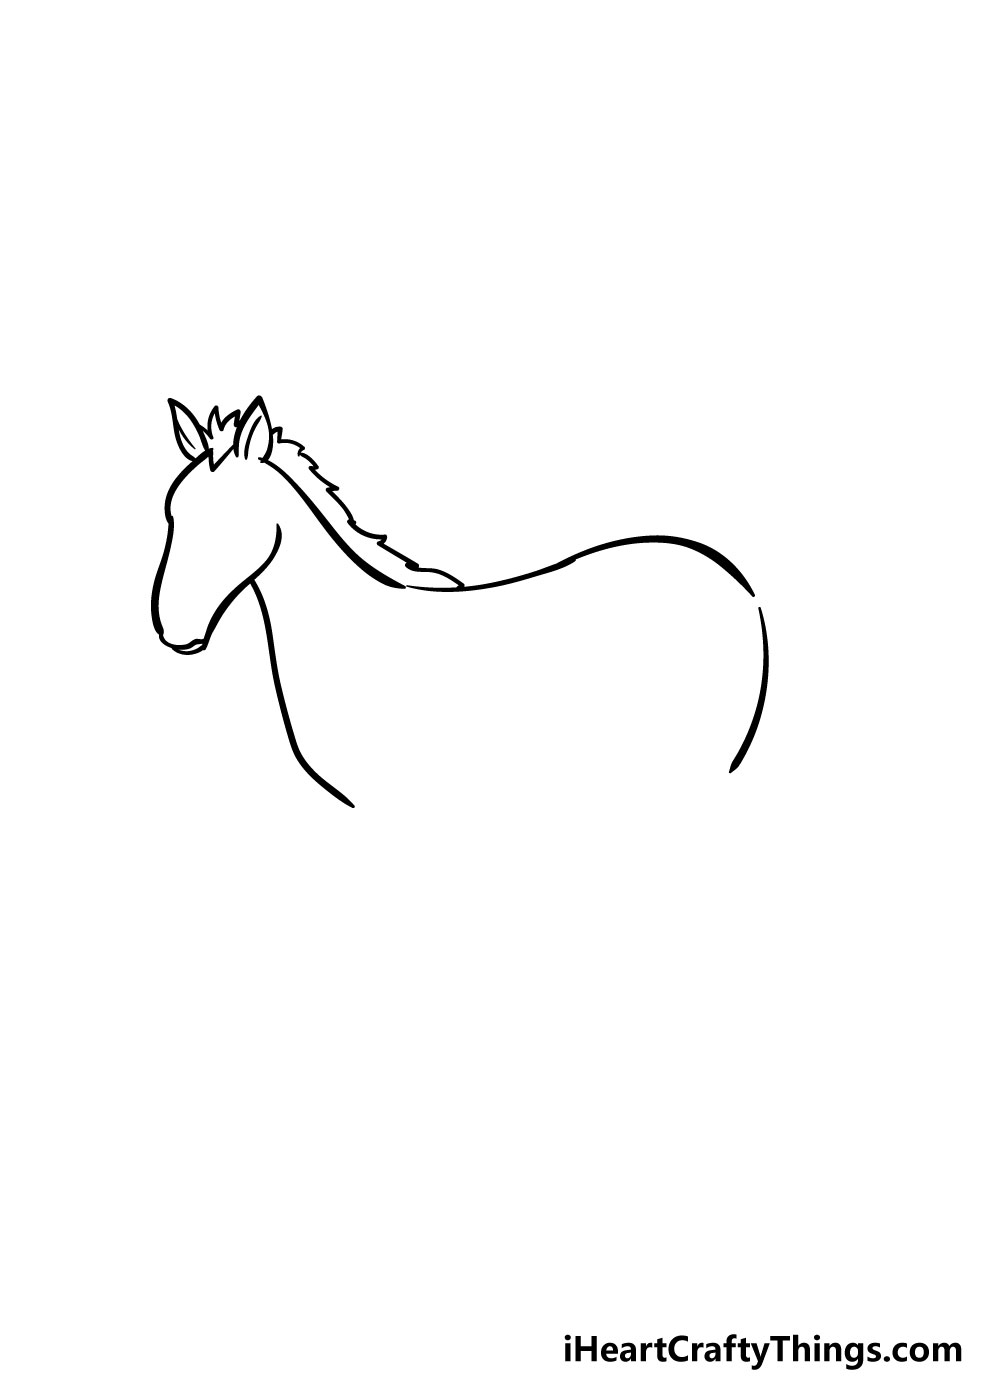
For the next step in learning how to draw a horse, we will be adding in two legs and the stomach.
For the first leg, start off with two curved lines near the chest to form the top of the leg so that it looks like the leg in the image.
You can then draw in two slightly curved lines for the next section of the leg, and then close it off with a hoof shape.
Next, draw in the back leg with a longer curved line at the top as you can see in the image.
Draw in the rest of the leg as you did before, and then make the stomach with a slightly curved line between both legs of your horse drawing.
Step 5 – Next you will be adding the next legs, tail and details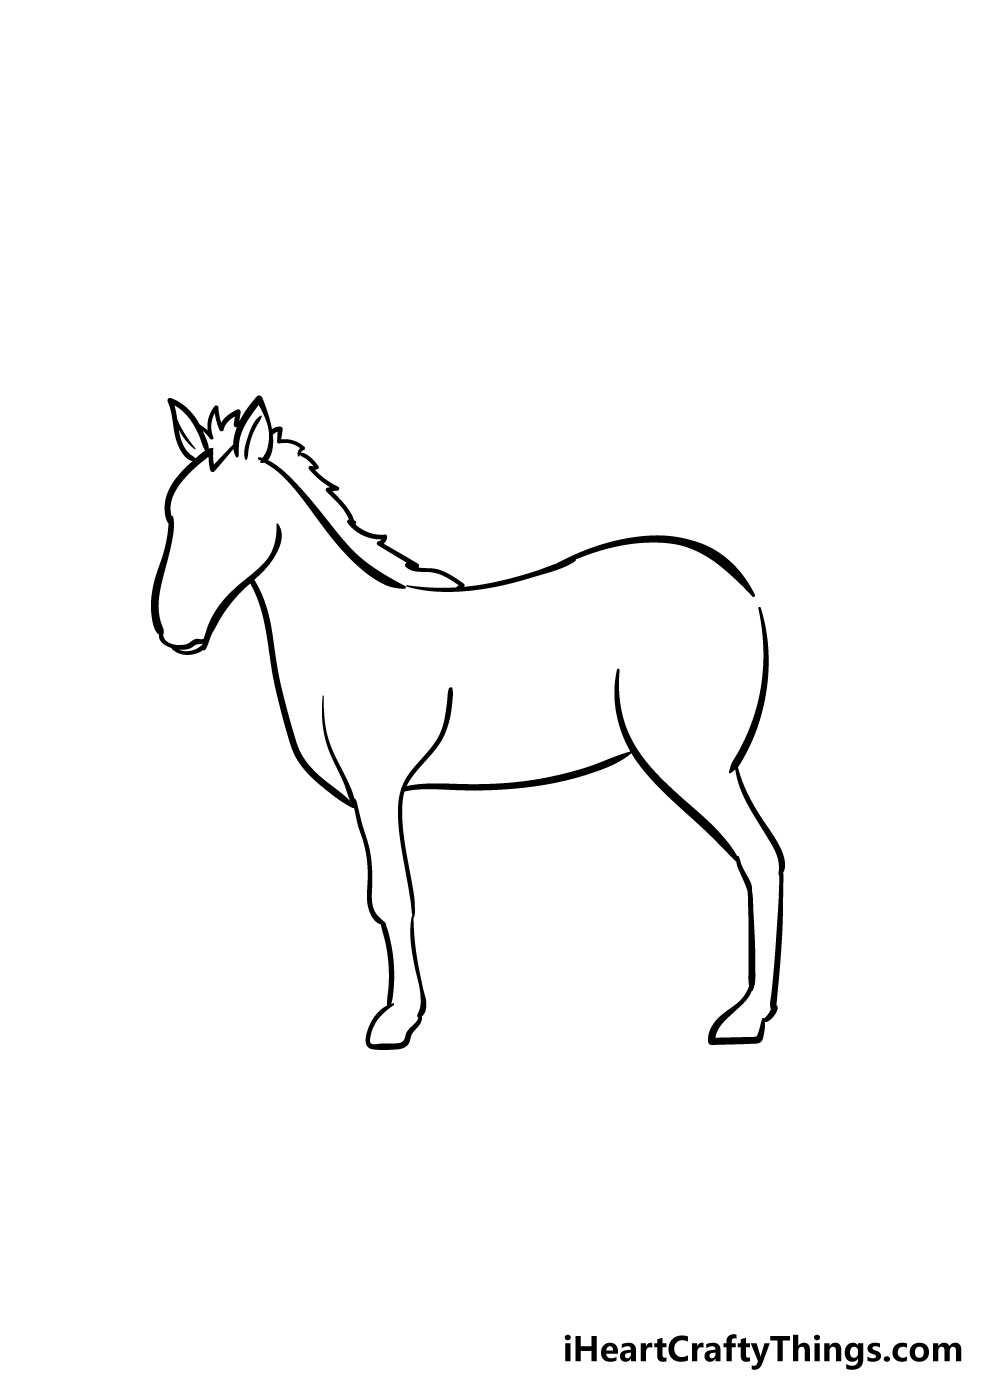
You've made it this far and you're close to finishing off your horse drawing! For the next step, draw in the other two legs, they will basically appear as slightly smaller versions of the legs you've already drawn, so that makes it a bit easier.
Once the legs are done, add in the tail using some wavy lines as you can see in the picture. Lastly, add in the nostril details which you will do by using some small lines.
Step 6 – Add in the eyes and face details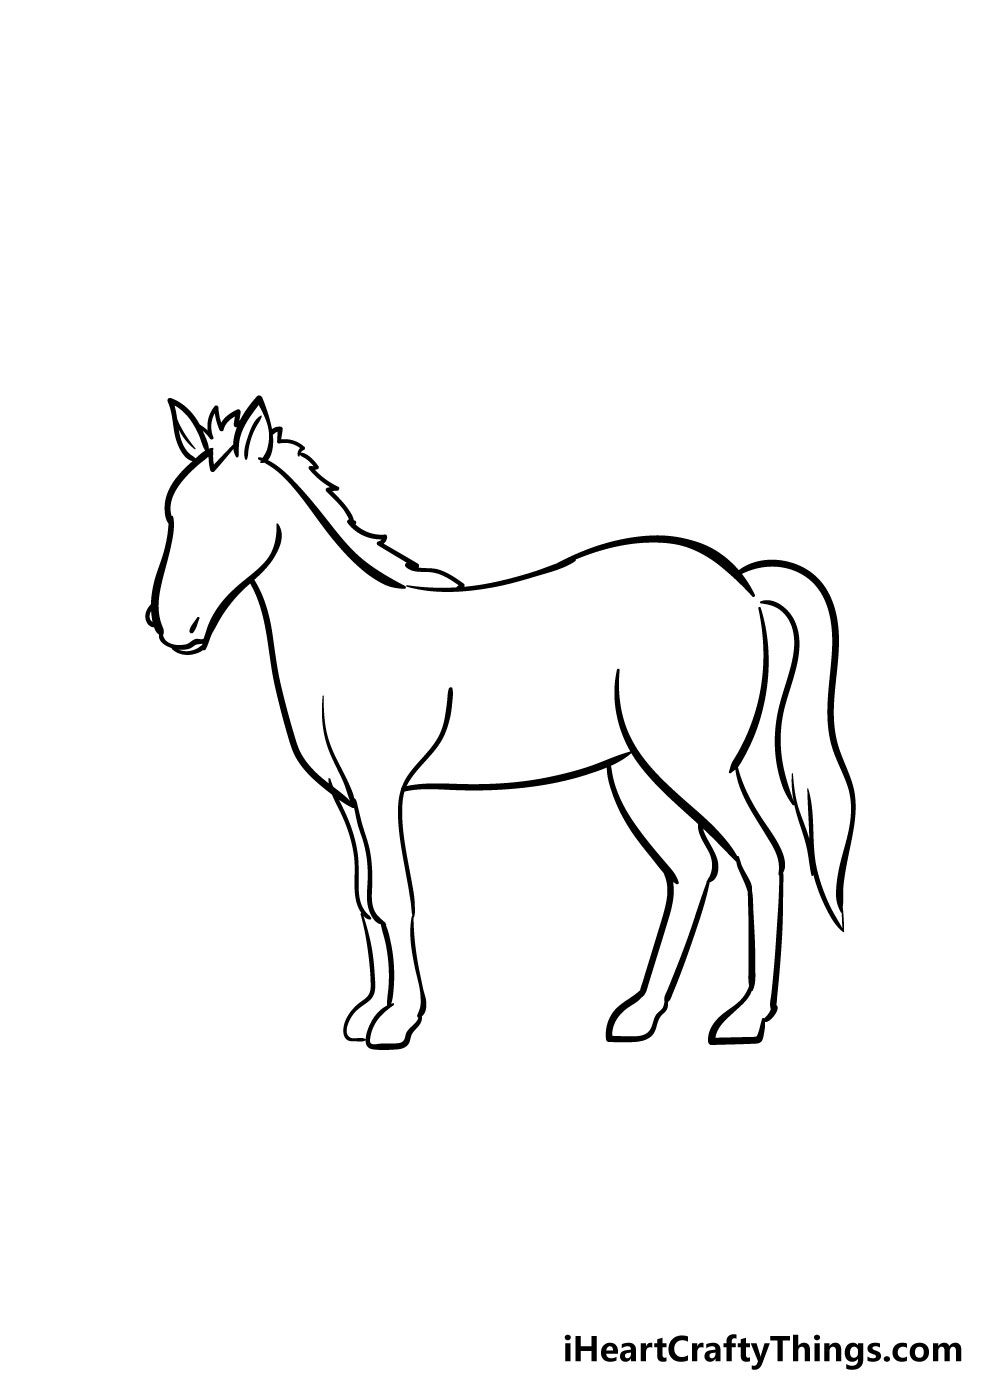
The hardest parts of learning how to draw a horse are behind you at this point, and you just have to add in some finishing touches!
For this step, draw in the eye, and refer to the reference picture for some line you can add to the face for some facial details.
Step 7 – Now draw in the final details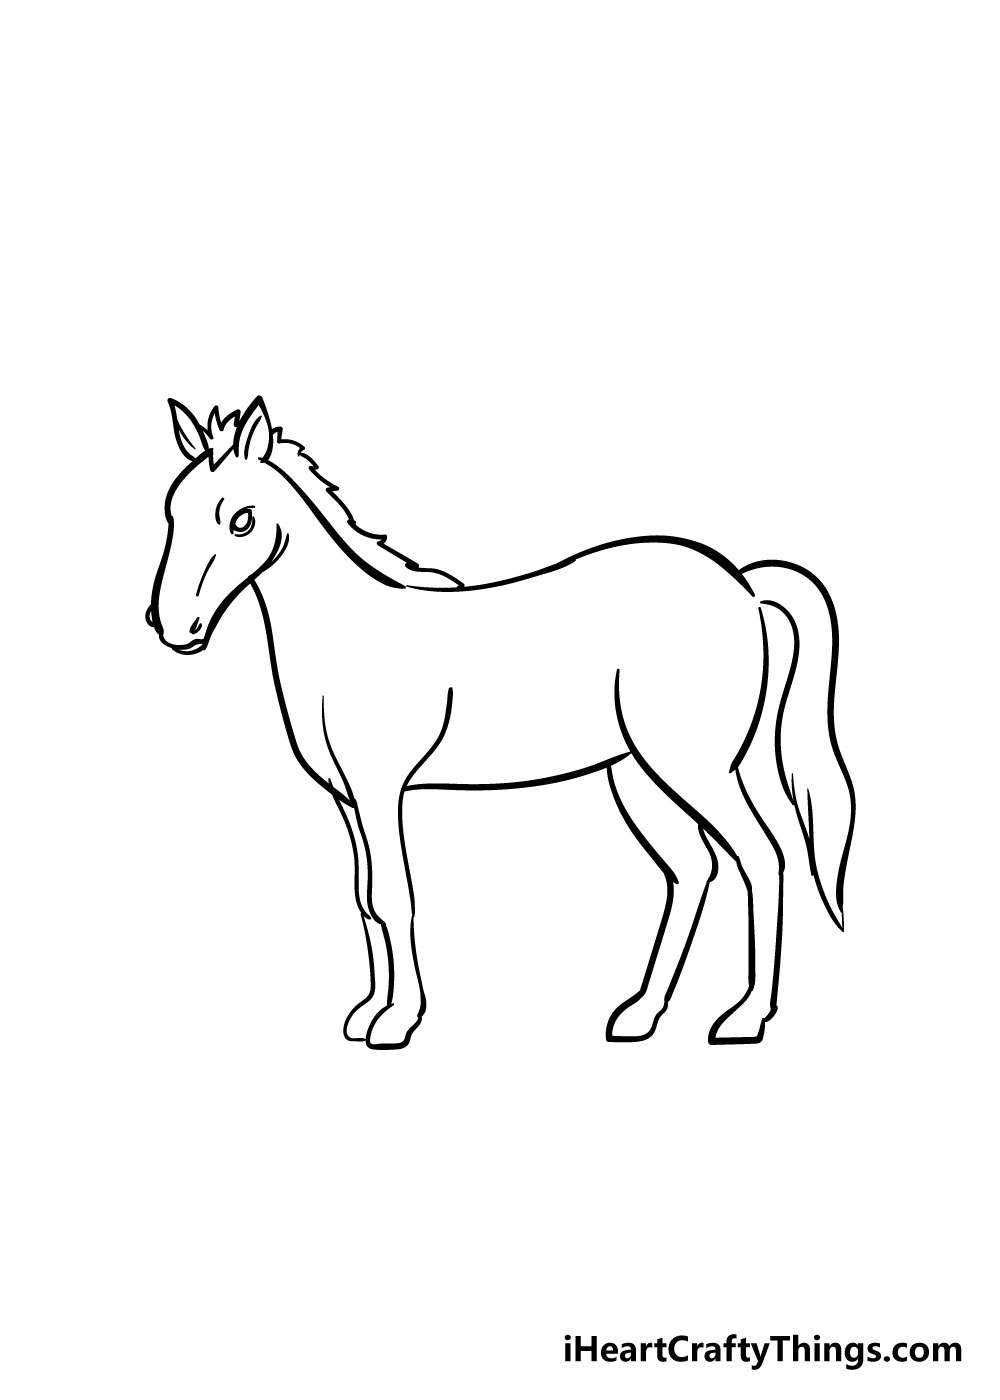
You're so close to finishing your horse drawing now! All we need to do is add in some details to give some muscle definition to your horse.
Following the guide image, you can add in some small lines in areas like the knees, neck and stomach.
The last detail is to use two small lines to draw in the hoof details. Once all these details are complete, guess what: your horse drawing is practically finished!
Step 8 – Finish it off with some color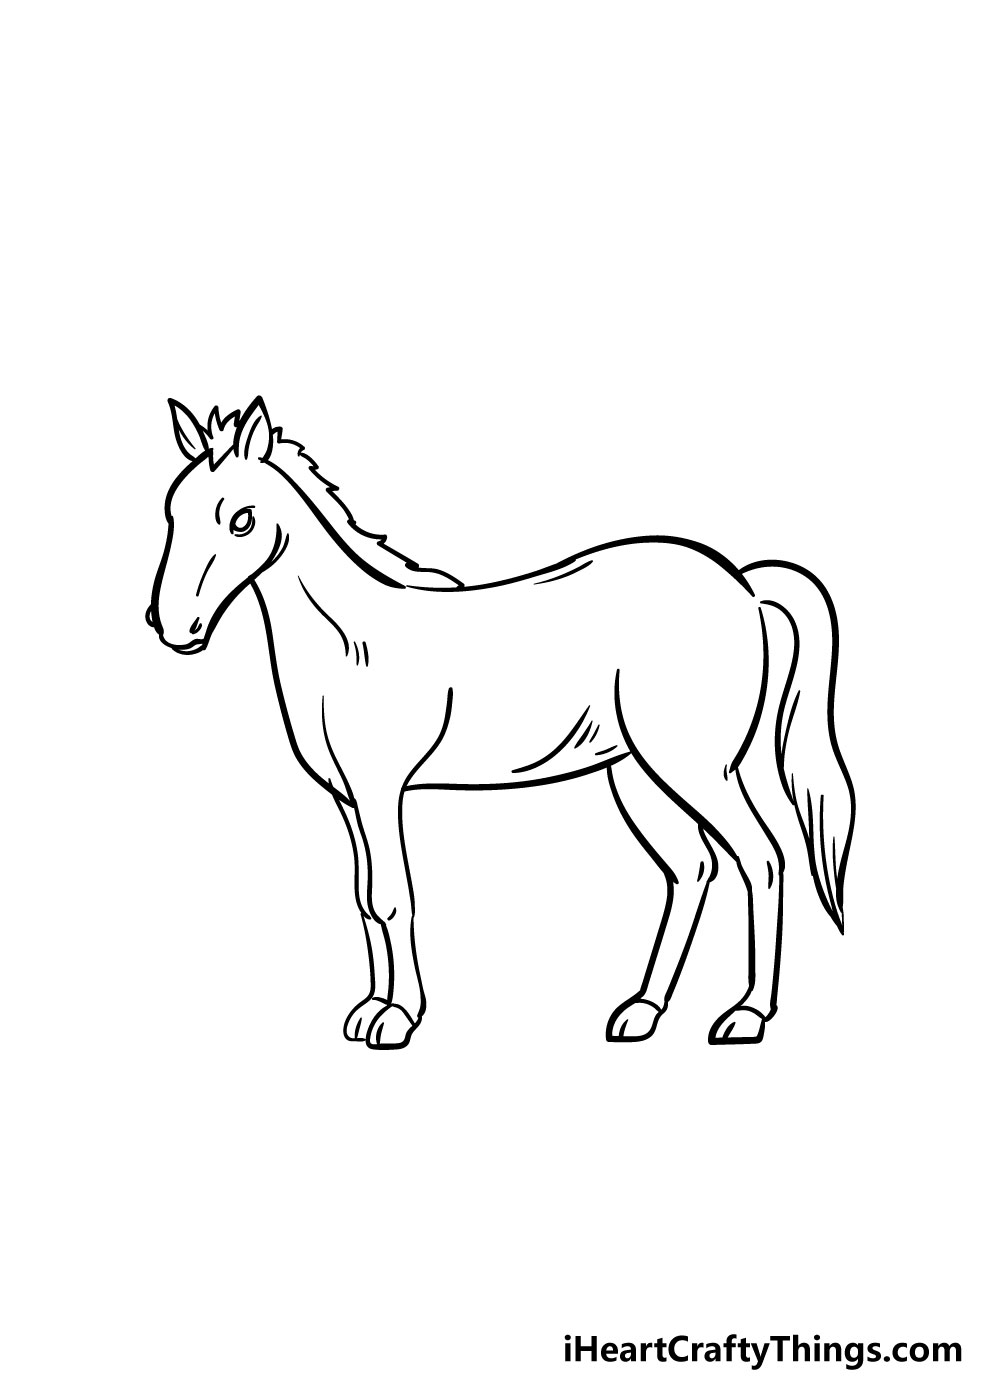
Before this horse is complete, there's one more really fun step to do, and that is coloring in your horse drawing!
Horses come in all kinds of wonderful colors and fur patterns, so this is your chance to let your creativity flow!
Will you use some more realistic horse colors for this drawing, or use your favorite bright colors to create a more stylistic look to it?
It can also be lots of fun to try out different art mediums, so you could experiment with acrylic paints, watercolors, colored pens and pencils for some stunning colors.
Once you've mastered drawing a horse, you could draw a few in slightly different positions and color schemes to create some great variety!
Step 9 – Now simply add the colors
Here's how you can make your horse drawing even better…
Make your horse drawing even better with these fun and informative tips!
Drawing horses is notoriously difficult, so we hope that the steps in this guide helped you! Once you have finished the steps, you can make it even better by using some reference materials.
This is especially true of something like a horse, as it can be really difficult drawing aspects like their legs, manes and tails.
You can find many images of horses online, and these will help make this horse drawing easy!
If you're feeling confident after finishing this guide, you could even add a few more horses to the picture.
Simply follow the steps and change a few details such as the positions of the legs and the patterns on their fur, and you will have a stunning picture of horses!
This could be quite an immense challenge, so definitely only attempt this once you feel like you can handle it. You could also add some additional animals as well if you're feeling especially ambitious.
Whether you add more horses or just keep it to this one, you can also add a background to make this drawing look even more impressive.
You could put them in a farm setting for one idea, and that would be a great opportunity to add some beautiful scenery behind them.
Or, maybe you could create a scene out of a Western movie and add some cowboys and desert scenery behind the horse. What kind of background would you like to create for this horse sketch?
Horses can come in many different colors, and their fur can have many different patterns and shapes on them as well.
That means that as you color this horse sketch, you have many different options you could choose!
You could make the colors look as intense or muted as you like depending on the art mediums that you use.
If you want to make it look like a still from an old movie, you could use some light browns and sepia tones to make it look like it's really old.
Your Horse Drawing is Complete!
Hopefully, this step-by-step guide on how to draw a horse in 8 easy steps was a fun and helpful tool in your journey to learn how to draw a horse!
Horses can be challenging to draw at first, but it doesn't have to be that hard when you break it down into the steps outlined in this guide.
We're sure that you'll be drawing horses with ease once you've used this guide!
When you've really gotten the hang of it, you could try out some different positions for your horse drawings and try out more fun colors and art mediums.
Once you've finished drawing and coloring your amazing horse drawings, we hope that you will share your artworks to our Facebook and Pinterest pages for us to admire!
We're always amazed by your artistic creativity and we can't wait to see the stunning horses that you'll be drawing using this guide.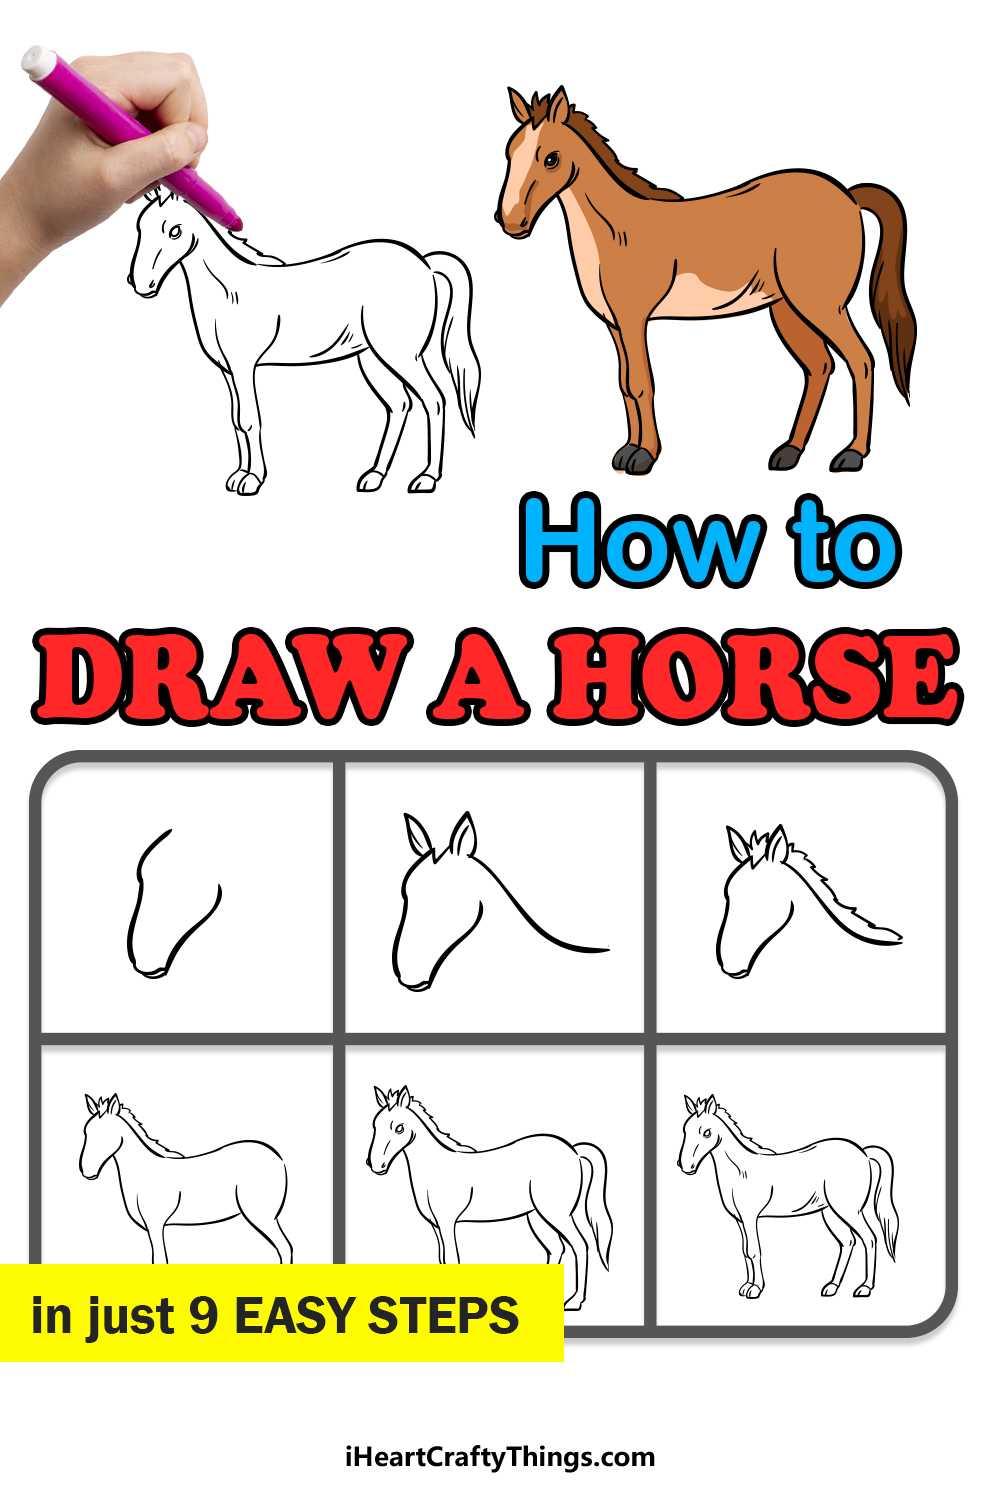
Source: https://iheartcraftythings.com/horse-drawing.html
0 Response to "Easy Right Facing Riding a Horse Drawing"
Post a Comment